The right floor. The right door.
Follow 6 Story Mission sequences and find approach notes for 48 named keys. Open a route for landmarks and gameplay close-ups.
Numbered steps show order and floor changes, not distances or surveyed paths. Read live signs, lock names and objectives.
No matching route. Try a building, key or mission name.
Operation Critical ExtractionStory mission · 4 stops
Interior sequence through Mirae General Hospital.
Operation Critical Extraction · Mirae General Hospital · Mirae lobby elevator bank · Link to this route
Select this Story Mission and follow your live objective tracker; codes and active conditions can differ.
Hospital approach
Grounds → wardsFollow the active waypoint through the hospital elevator hall into the patient wards.
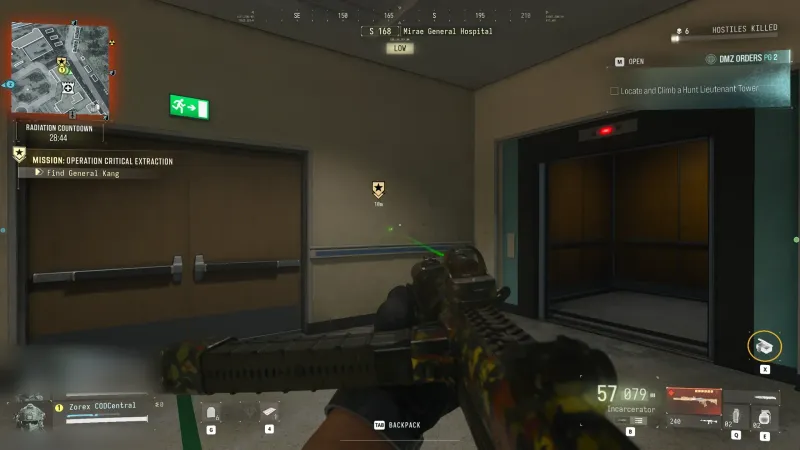
Route reference Elevator hall inside Mirae General Hospital during the Find General Kang step of Operation Critical Extraction Gameplay © Activision · COD Central ↗ 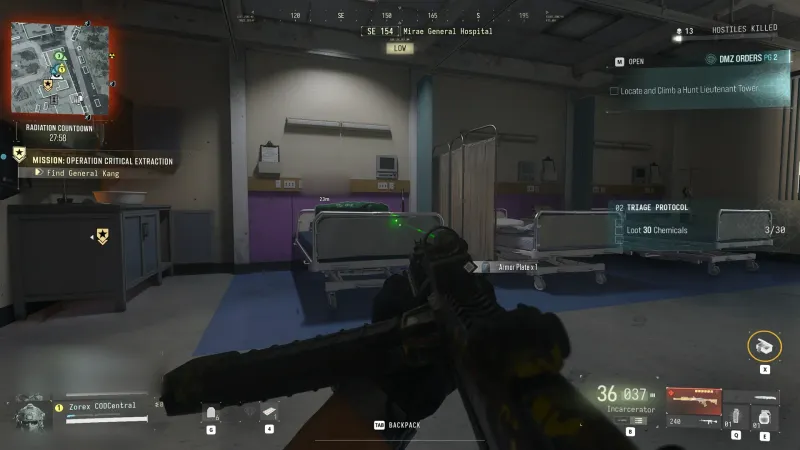
Route reference Hospital ward with beds and curtains while searching for General Kang in Operation Critical Extraction Gameplay © Activision · COD Central ↗ Move Kang
Wards → lobbyPush Kang’s bed through the corridor while the squad clears ahead. The first lift takes the bed down to the lobby.
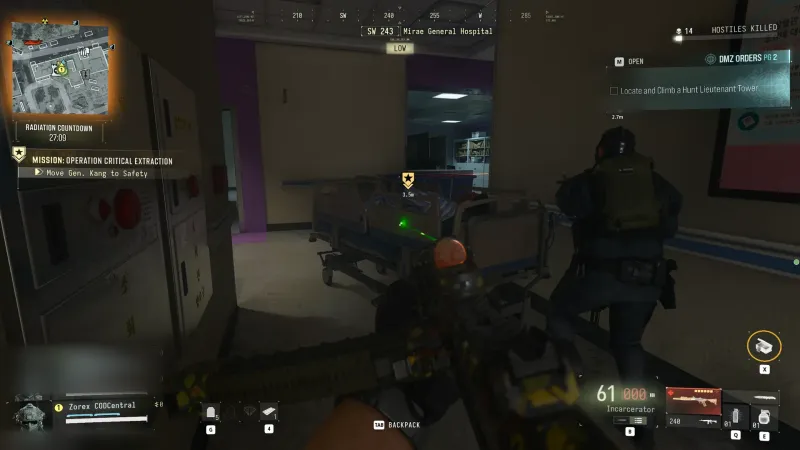
Route reference Squad pushing General Kang on his hospital bed into the corridor during the Move Gen. Kang to Safety step Gameplay © Activision · COD Central ↗ Elevator hold
Lobby → roofDefend the next elevator bank until it opens, then move the bed inside and take it to the roof.
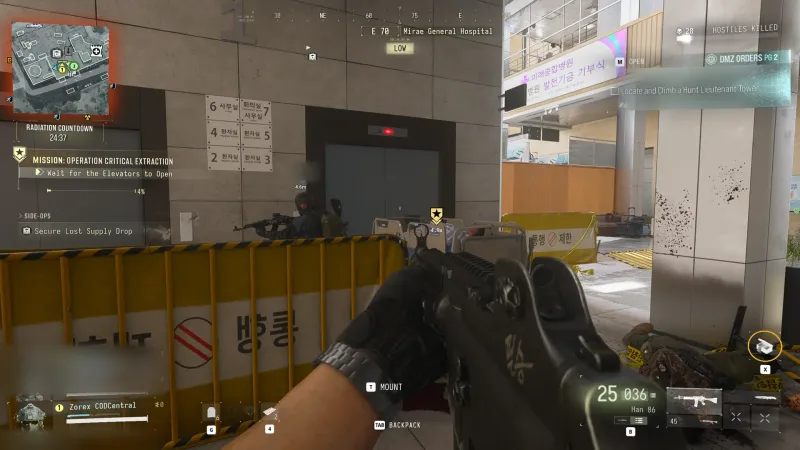
Route reference General Kang's bed parked by the elevators in the Mirae General Hospital lobby during the Wait for the Elevators to Open step Gameplay © Activision · COD Central ↗ Helicopter ramp
Rooftop helipadPush the bed up the helicopter’s rear ramp and watch for mission completion. Taking the helicopter yourself is a separate choice.
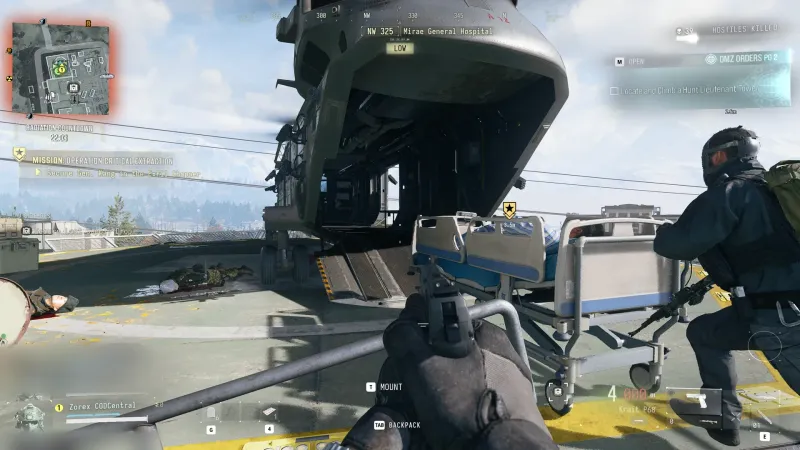
Route reference Squadmate pushing General Kang's hospital bed across the hospital helipad toward the exfil chopper in Operation Critical Extraction Gameplay © Activision · COD Central ↗
Mission credit and retaining carried loot are separate. Follow the active extraction objective when one is required.
Still unclear
- Surveyed floor-plan geometry, uninterrupted footage of every transition and current-build reproduction.
Operation Fallen EmberStory mission · 6 stops
Interior sequence through Haneul Nuclear Reactor.
Operation Fallen Ember · Haneul Nuclear Reactor · Reactor 02 · Reactor 01 · Link to this route
Select this Story Mission and follow your live objective tracker; codes and active conditions can differ.
Safety lockdown
Reactor interior controlsFollow the marker to disengage safety lockdown. The recorded control frame labels Reactor 02 while the objective unlocks Reactor 01.
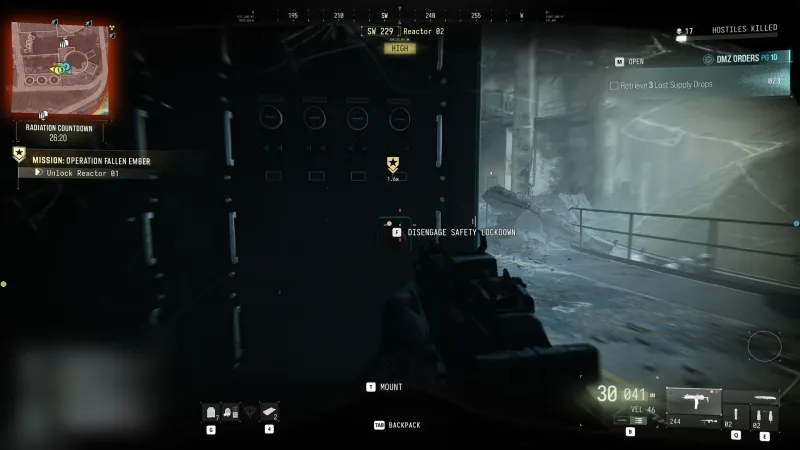
Route reference MW4 DMZ red button on the control panel that unlocks Reactor 01 in Operation Fallen Ember Gameplay © Activision · COD Central ↗ Safety console
Reactor 01 control roomRead the console’s current letter-number target and confirm the next manual release.
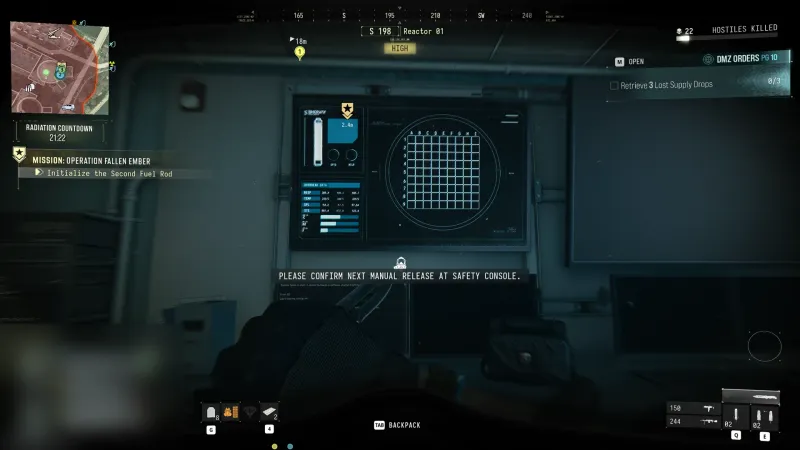
Route reference MW4 DMZ Reactor 01 safety console with the fuel rod grid that gives you the code for the next rod Gameplay © Activision · COD Central ↗ Three fuel rods
Control room ↔ flooded poolDescend to the matching rod, open its container and withdraw it. Return to confirm; repeat for all three current targets.
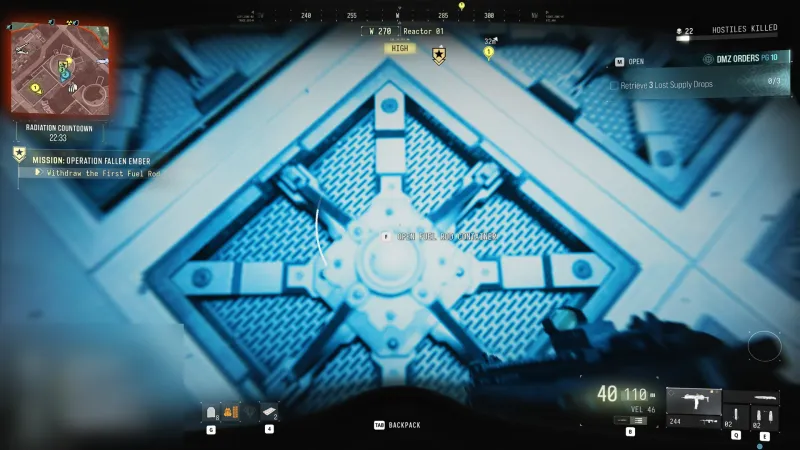
Route reference MW4 DMZ fuel rod container on the floor of the reactor pool in Operation Fallen Ember Gameplay © Activision · COD Central ↗ Decontamination
Reactor 01 → Reactor 02Process the three rods at the decontamination chamber and recover the cleaned rods.
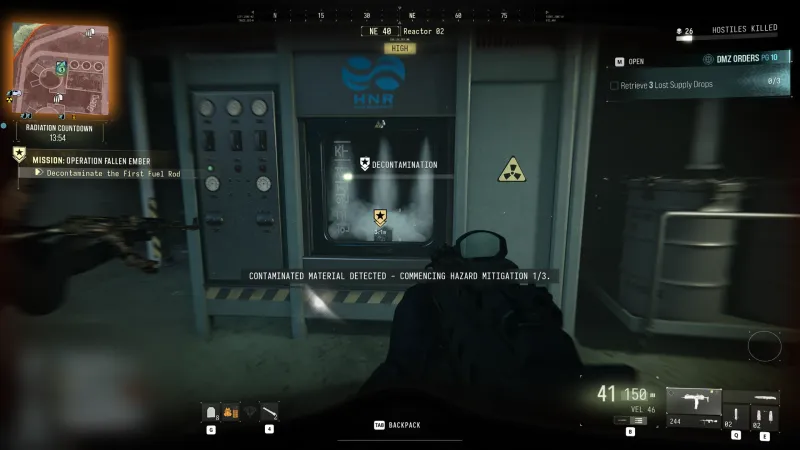
Route reference MW4 DMZ decontamination chamber in Reactor 02 cleaning a fuel rod during Operation Fallen Ember Gameplay © Activision · COD Central ↗ Warhead and boathouse
Reactor yard → waterfrontFollow the warhead objective through reinforcements, recover the boathouse key when directed, and open the boat garage.
Boat escape
Waterfront → rendezvousDrive to the chopper and escort it as directed while covering the boat. Follow the final prompts, then choose an active exfil for retained loot.
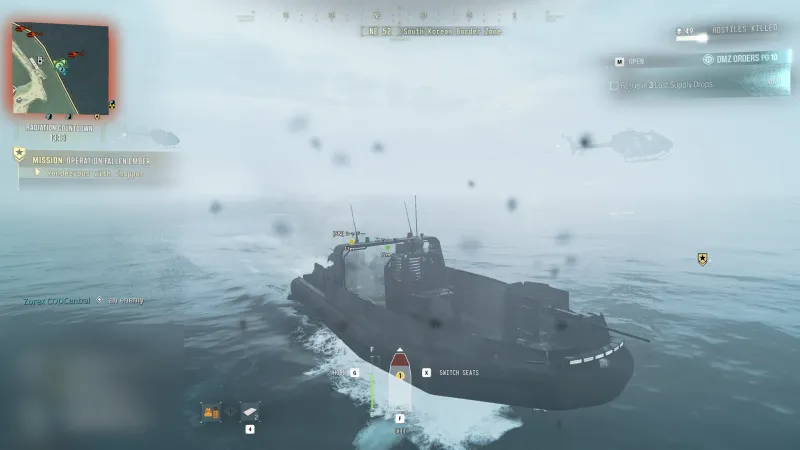
Route reference MW4 DMZ boat escape in Operation Fallen Ember with enemy helicopters chasing the squad Gameplay © Activision · COD Central ↗
Mission credit and retaining carried loot are separate. Follow the active extraction objective when one is required.
Still unclear
- Surveyed floor-plan geometry, uninterrupted footage of every transition and current-build reproduction.
Operation Grid AssaultStory mission · 4 stops
Interior sequence through The Grid.
Operation Grid Assault · The Grid · DBN Headquarters · Hotel Lucera · Link to this route
Select this Story Mission and follow your live objective tracker; codes and active conditions can differ.
Drone control
DBN entrance → upper server roomEnter DBN Headquarters, take the lift up and hack the drone-control laptop.
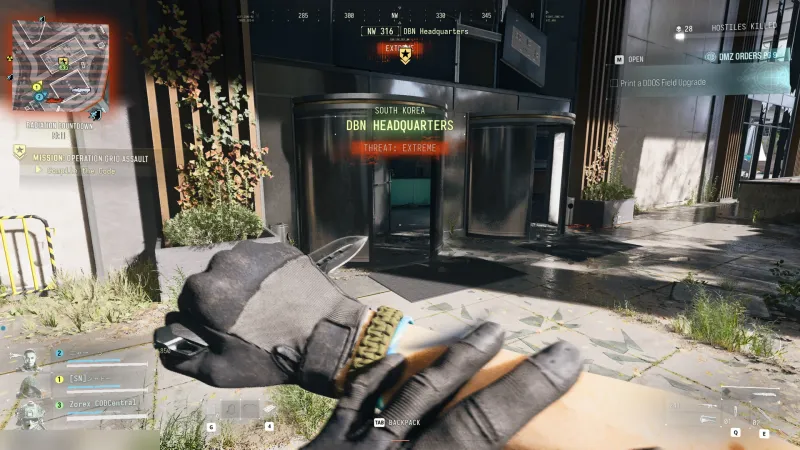
Route reference MW4 DMZ DBN Headquarters entrance in The Grid with an Extreme threat banner Gameplay © Activision · COD Central ↗ 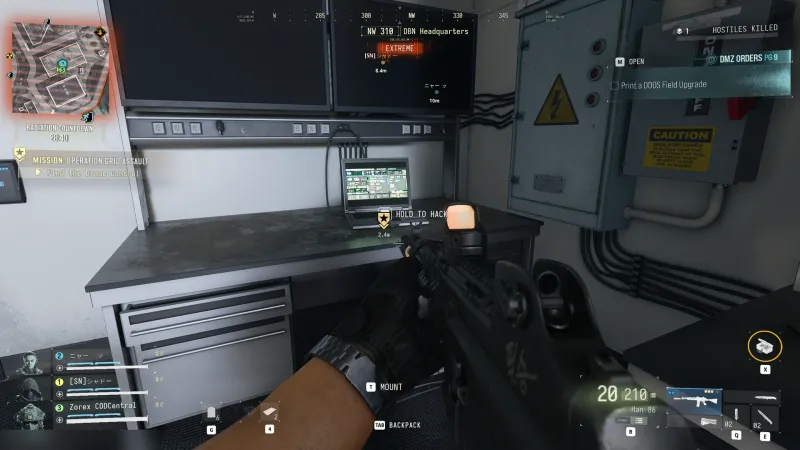
Route reference MW4 DMZ drone control laptop in DBN Headquarters with the Hold to Hack prompt Gameplay © Activision · COD Central ↗ Second segment
DBN → Hotel LuceraTravel to Hotel Lucera for the second code segment. Follow the active marker within the hotel.
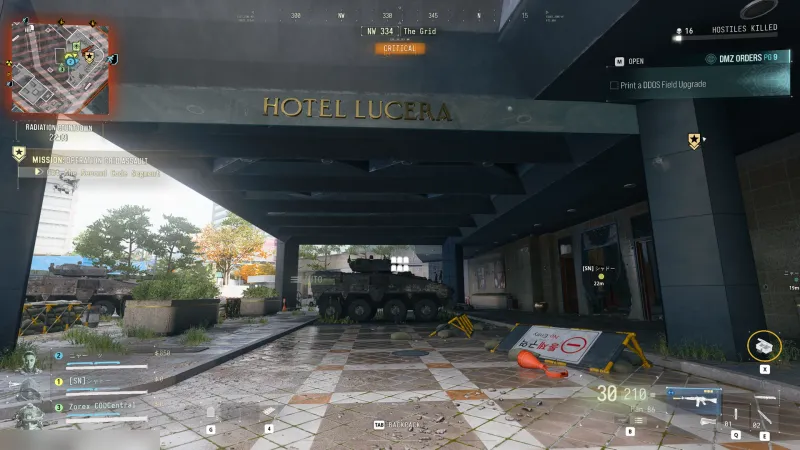
Route reference MW4 DMZ Hotel Lucera entrance in The Grid during Get the Second Code Segment Gameplay © Activision · COD Central ↗ Compile and defend
Return to DBNReturn to the laptop, compile the segments, then upload and defend the antenna until complete.
Broadcast
Building → radio tower topClimb the radio tower and interact with the top terminal to broadcast the kill code. This sequence is not a measured parkour route.
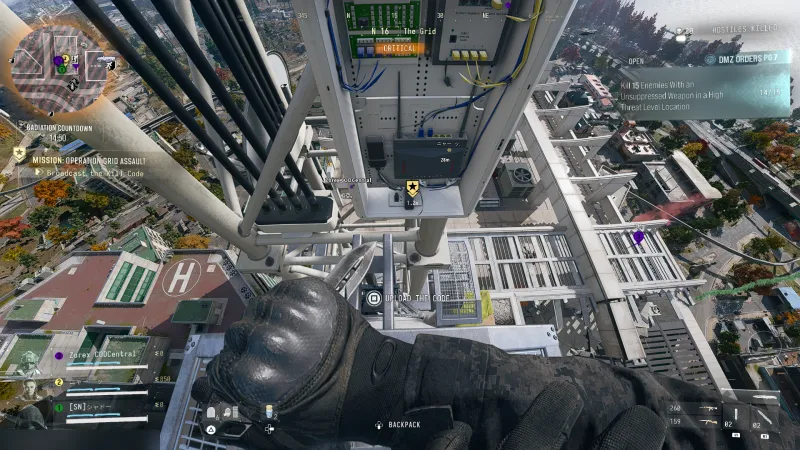
Route reference MW4 DMZ view from the top of the radio tower over The Grid with the Upload the Code prompt Gameplay © Activision · COD Central ↗
Mission credit and retaining carried loot are separate. Follow the active extraction objective when one is required.
Still unclear
- Surveyed floor-plan geometry, uninterrupted footage of every transition and current-build reproduction.
Operation Iron CitadelStory mission · 6 stops
Interior sequence through Chang-san Air Base.
Operation Iron Citadel · Chang-san Air Base · Admin Complex No. 2 · Air Base Bunker · Link to this route
Select this Story Mission and follow your live objective tracker; codes and active conditions can differ.
Find the mission card
Marked search buildingsSearch the current objective areas for the multi-use access card; a recorded desk placement is an example.
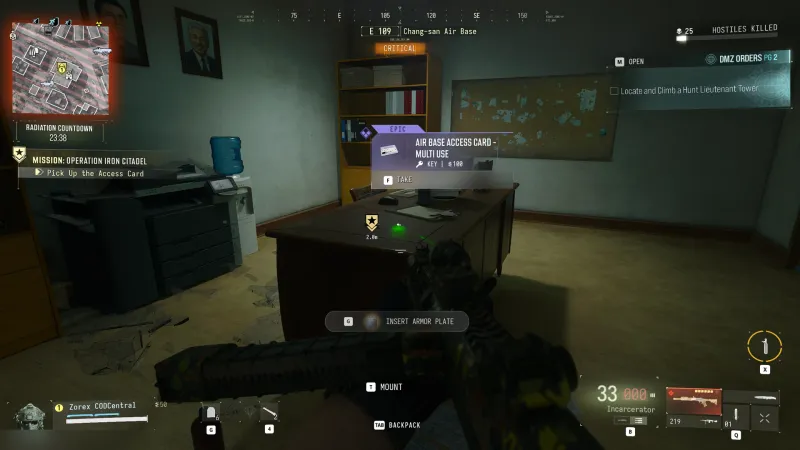
Route reference MW4 DMZ Air Base Access Card Multi Use lying on an office desk at Chang-san Air Base Gameplay © Activision · COD Central ↗ Upgrade access
Admin Complex No. 2Use the upgrade terminal and follow the newly available bunker objective.
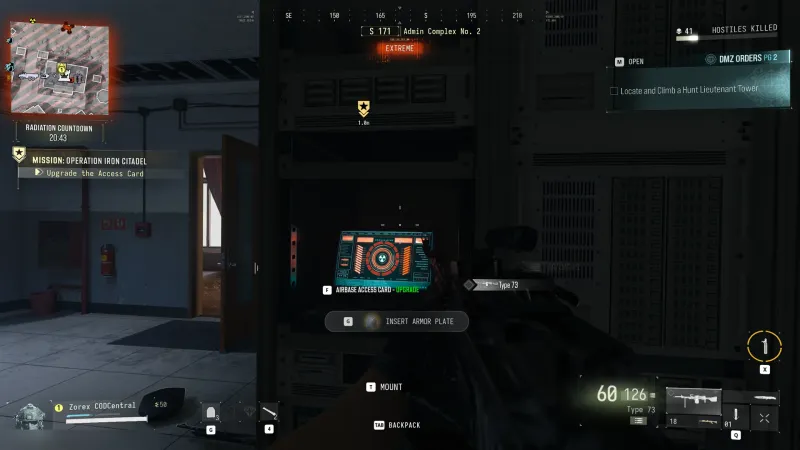
Route reference MW4 DMZ Airbase Access Card upgrade terminal inside Admin Complex No. 2 Gameplay © Activision · COD Central ↗ Bunker entry
Surface → entrance garageEnter the bunker. A recorded run encounters Colossus in the entrance garage; this is encounter context, not an unconditional spawn.
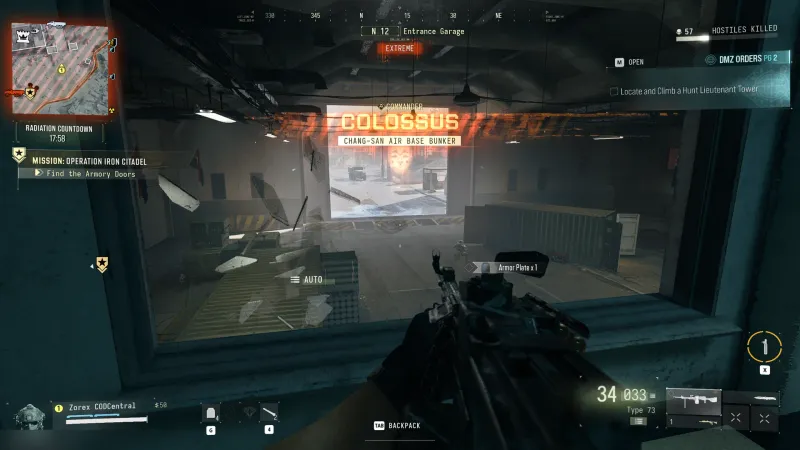
Route reference MW4 DMZ Commander Colossus banner in the Chang-san Air Base Bunker garage during Operation Iron Citadel Gameplay © Activision · COD Central ↗ Code segments
Bunker roomsRead the three ordered armory code fragments. Enter your deployment’s assembled code at the keypad.
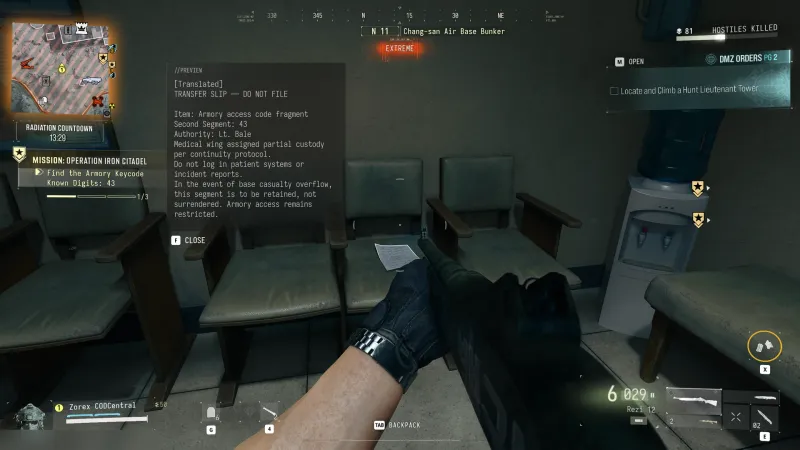
Route reference MW4 DMZ armory keycode note in the Chang-san Air Base Bunker showing the second segment of the code Gameplay © Activision · COD Central ↗ 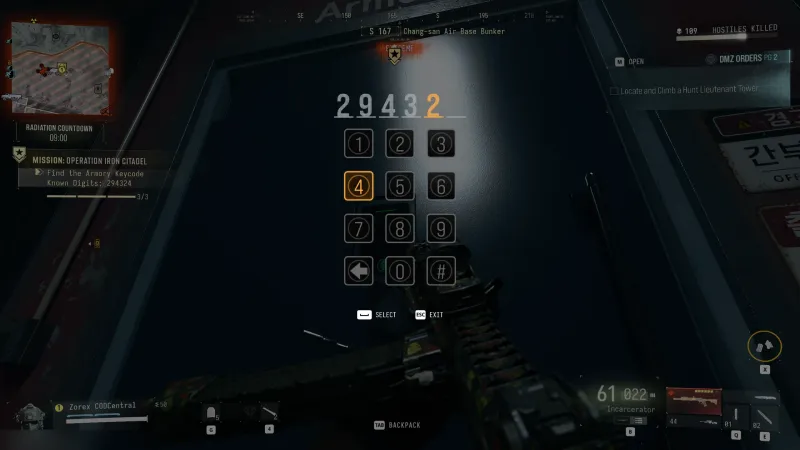
Route reference MW4 DMZ armory keypad in the Chang-san Air Base Bunker with the six-digit code being entered Gameplay © Activision · COD Central ↗ Manifest and aircraft
Armory → tarmacCollect the armory manifest and follow the aircraft sabotage objectives.
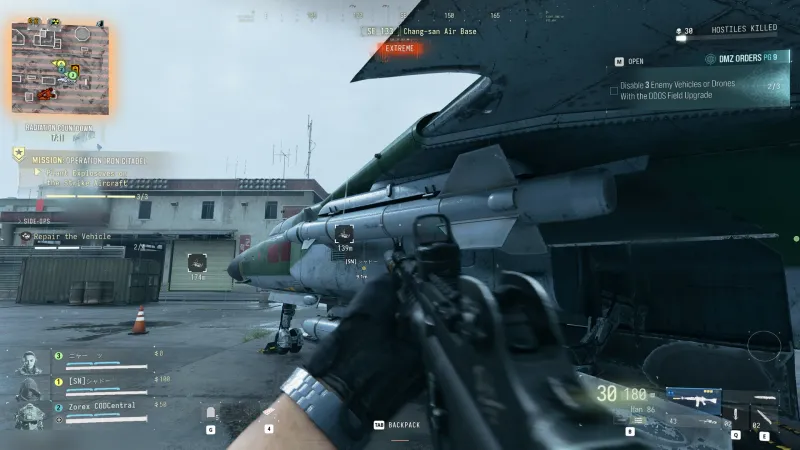
Route reference MW4 DMZ strike aircraft on the Chang-san Air Base tarmac with Plant Explosives on the Strike Aircraft at 3 of 3 Gameplay © Activision · COD Central ↗ Finish and extract
Air base → active exfilComplete the remaining SAM-site objective and extract the manifest as the tracker directs.
Mission credit and retaining carried loot are separate. Follow the active extraction objective when one is required.
Still unclear
- Surveyed floor-plan geometry, uninterrupted footage of every transition and current-build reproduction.
Operation Shopping HacksStory mission · 5 stops
Interior sequence through NuriGO Mall.
Operation Shopping Hacks · NuriGO Mall · Link to this route
Select this Story Mission and follow your live objective tracker; codes and active conditions can differ.
Encampment laptop
Mall approachHack the laptop by the window and wait for analysis. Use the code displayed in your own objective.
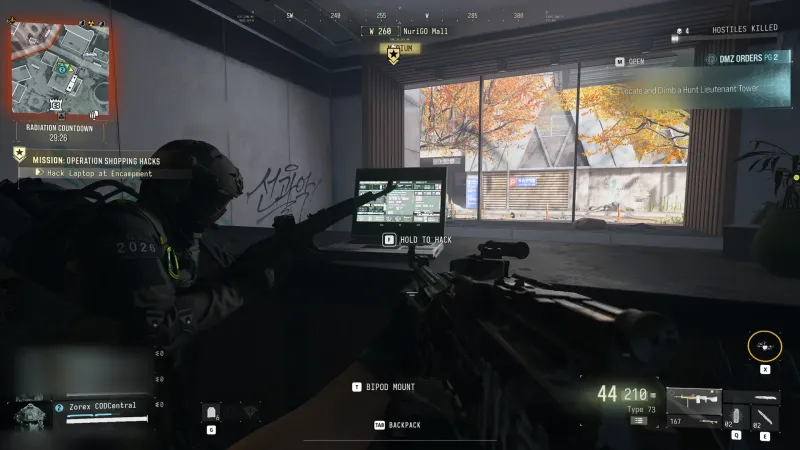
Route reference Operation Shopping Hacks Hold to Hack prompt on the encampment laptop at NuriGO Mall while a squadmate stands guard Gameplay © Activision · COD Central ↗ Security Annex
Storefronts → annexReach mall security, enter the current code, and start the annex generator before decrypting its laptop.
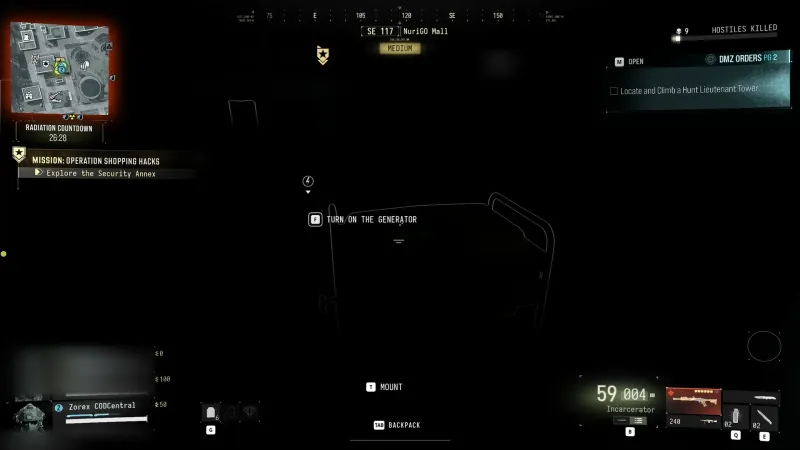
Route reference Pitch-dark Security Annex in Operation Shopping Hacks with the Turn On the Generator prompt Gameplay © Activision · COD Central ↗ Four-core lab door
Lower secured areaSupply four working K9 Battery Cores to the mission terminal. Destroyed cores do not satisfy it.
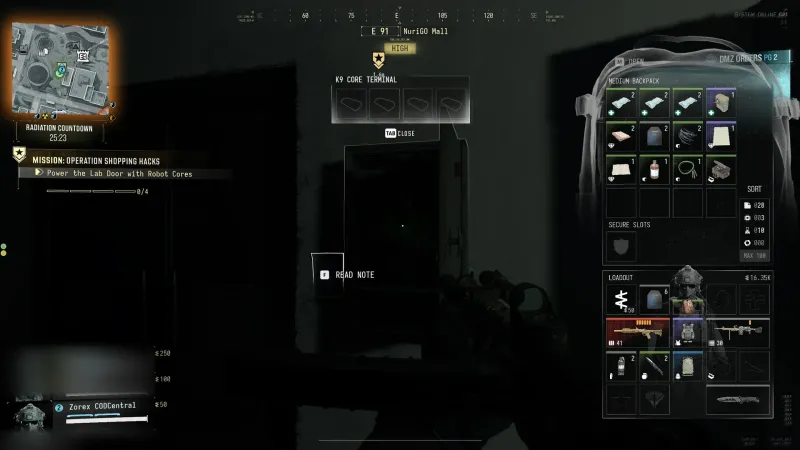
Route reference K9 Core Terminal at the NuriGO Mall lab door in Operation Shopping Hacks with four empty battery core slots Gameplay © Activision · COD Central ↗ Network breach
LabHack five computers. Restart the orange error-screen terminals during the breach while the squad covers the room.
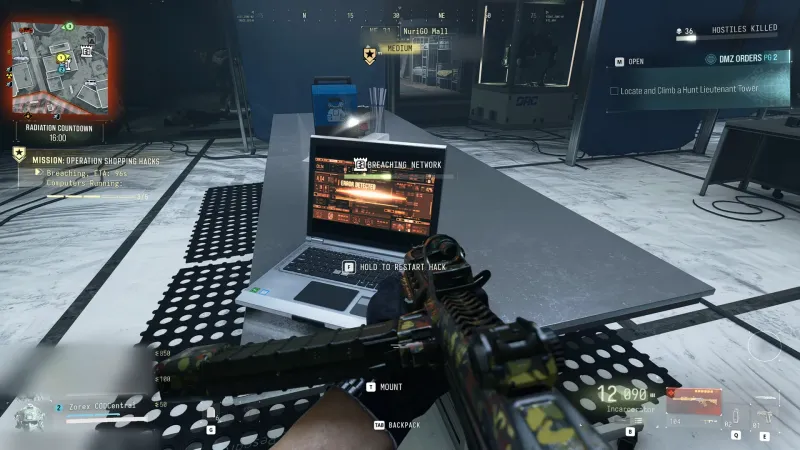
Route reference Lab laptop showing the orange error screen during the network breach in Operation Shopping Hacks with 3 of 5 computers running Gameplay © Activision · COD Central ↗ Lab vault and exit
Lab → rooftopWait for the servers, loot the vault and follow the rooftop extraction objective. The DRC locker’s extra gate remains separate.
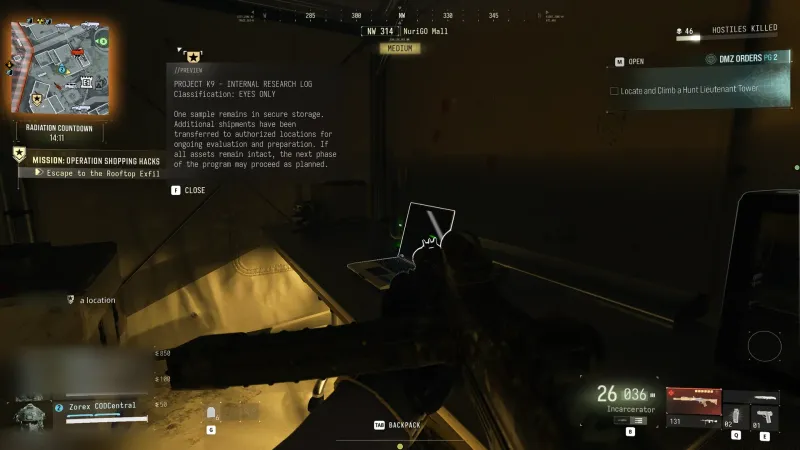
Route reference Project K9 internal research log intel on the vault room laptop in Operation Shopping Hacks Gameplay © Activision · COD Central ↗
Mission credit and retaining carried loot are separate. Follow the active extraction objective when one is required.
Still unclear
- Surveyed floor-plan geometry, uninterrupted footage of every transition and current-build reproduction.
Operation Silent LedgerStory mission · 5 stops
Interior sequence through Heavenly Luck Casino.
Operation Silent Ledger · Heavenly Luck Casino · Heavenly Luck Casino Penthouse Security · Link to this route
Select this Story Mission and follow your live objective tracker; codes and active conditions can differ.
Restore power
Casino → parkingCross the gaming floor and descend to parking. Start the yellow generator in the back room using its timing interaction.
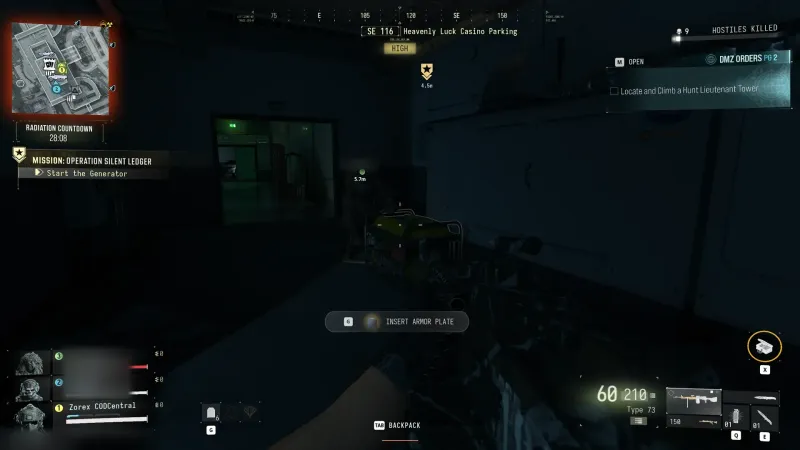
Route reference Yellow generator in a dark room of the Heavenly Luck Casino Parking during Operation Silent Ledger Gameplay © Activision · COD Central ↗ Security camera
Parking → penthouseGo up to penthouse security. Use the parking camera station and cycle views to open the vault fence.
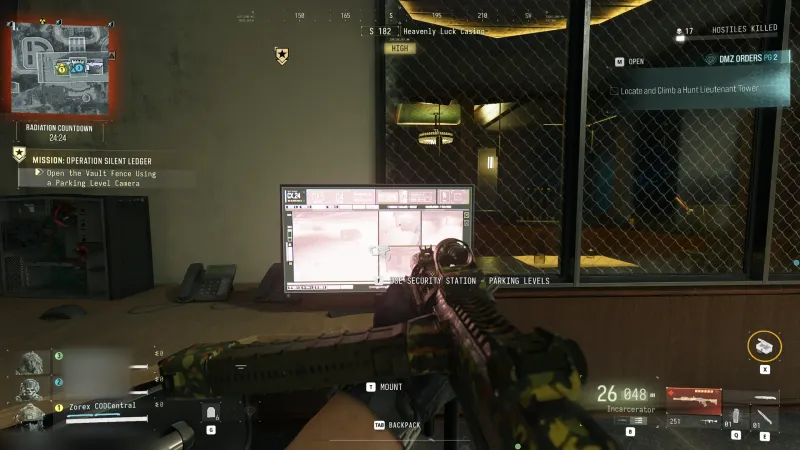
Route reference Security Station Parking Levels prompt at a CCTV desk in penthouse security during Operation Silent Ledger Gameplay © Activision · COD Central ↗ Parking lift
Lobby → B1/B2Return to the lobby lift marked B1/B2 PARKING. Descend toward the mission vault.
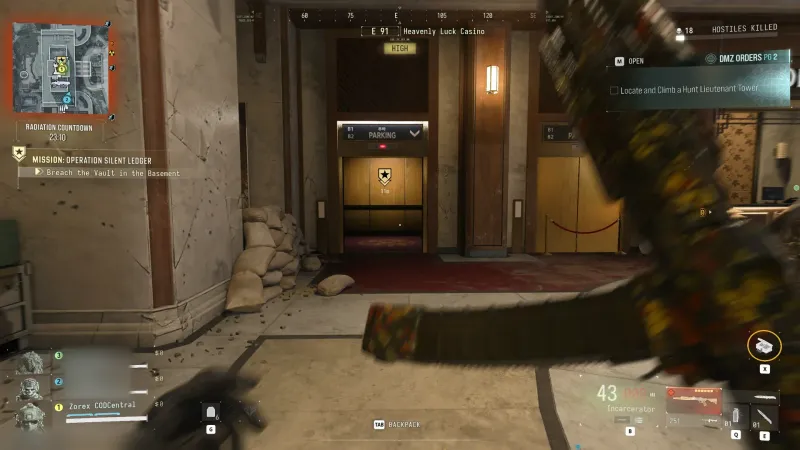
Route reference Casino lobby elevator marked B1 B2 Parking with the Breach the Vault objective in Operation Silent Ledger Gameplay © Activision · COD Central ↗ Breach and collect
Basement vaultPlace the drill, defend until it finishes, and recover the printing plates. Optional cash bags are a separate objective.
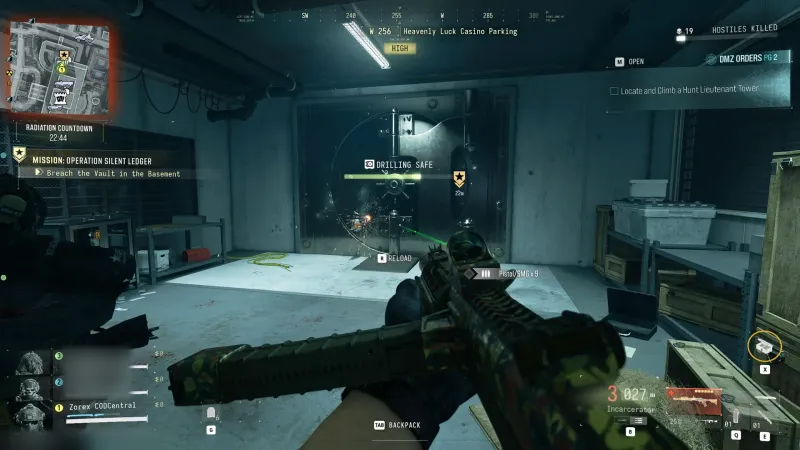
Route reference Drill on the round casino vault door with the Drilling Safe progress bar in Operation Silent Ledger Gameplay © Activision · COD Central ↗ 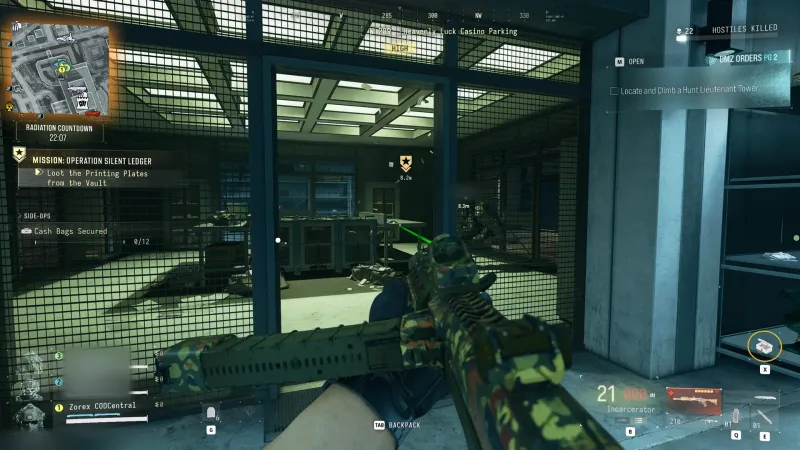
Route reference Inside the casino vault cage in Operation Silent Ledger with the Cash Bags Secured 0/12 side op on screen Gameplay © Activision · COD Central ↗ Extract the plates
Basement → active exfilTake the plates to the active helicopter extraction. The Counting Room key does not bypass this drill route.
Mission credit and retaining carried loot are separate. Follow the active extraction objective when one is required.
Still unclear
- Surveyed floor-plan geometry, uninterrupted footage of every transition and current-build reproduction.
Air Base Access CardKey destination · 2 stops
Follow the search buildings → admin complex 2 approach.
Air Base Access Card · Admin Complex No. 2 · Link to this route
Carry the matching key and check the named interaction before unlocking.
Search marked buildings
Search buildings → Admin Complex 2During Iron Citadel, search the active objective’s buildings for the multi-use access card. The pictured desk is one run, not a fixed spawn.
Upgrade terminal
Search buildings → Admin Complex 2Take the card to the Admin Complex No. 2 terminal and follow the upgrade interaction.
Route reference MW4 DMZ Air Base Access Card Multi Use lying on an office desk at Chang-san Air Base Gameplay © Activision · COD Central ↗ Route reference MW4 DMZ Airbase Access Card upgrade terminal inside Admin Complex No. 2 Gameplay © Activision · COD Central ↗
Opened containers can differ. Keep a return route and extract to retain carried loot.
Still unclear
- Current-build applicability and alternate entrances.
Air Base DRC Weapons LockerKey destination · 3 stops
Follow the bunker armory approach.
Air Base DRC Weapons Locker · Air Base DRC Weapons Locker · Air Base Bunker · Link to this route
Carry the matching key and check the named interaction before unlocking.
Reach the armory
Bunker armoryThe recorded route follows Iron Citadel’s card upgrades and the armory code. Bring the separate DRC key.
Right-hand window
Bunker armoryFrom that armory approach, turn right and pass through the window. Look between the lockers for yellow-and-blue DRC branding.
Named locker
Bunker armoryCheck AIR BASE DRC WEAPONS LOCKER at the interaction. Access through this mission does not prove it is the only possible route.
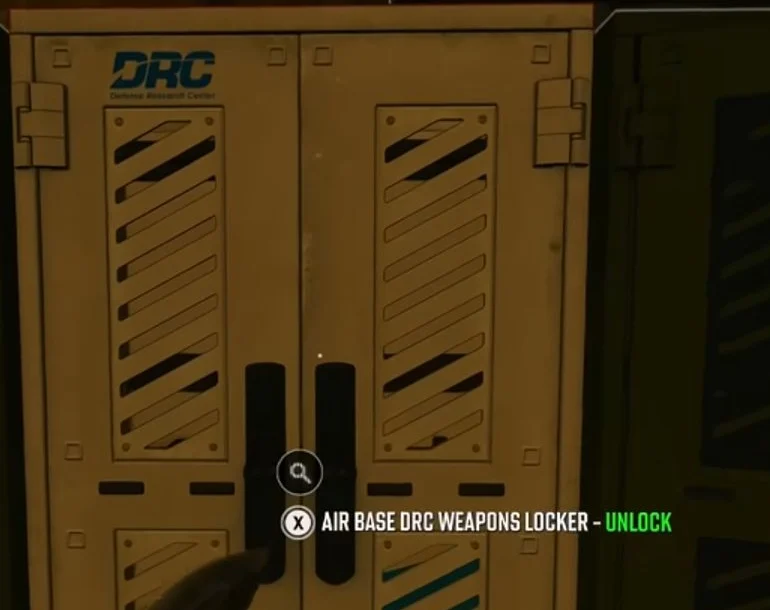
Named lock close-up Yellow-and-blue DRC locker with the Air Base DRC Weapons Locker unlock prompt Gameplay © Activision · DMZ Codex ↗
Opened containers can differ. Keep a return route and extract to retain carried loot.
Still unclear
- Current-build applicability and alternate entrances.
Armory CardKey destination · 2 stops
Follow the admin complex 2 → bunker approach.
Armory Card · Air Base Bunker · Link to this route
Carry the matching key and check the named interaction before unlocking.
Upgrade the mission card
Admin Complex 2 → bunkerComplete the Iron Citadel card upgrade at Admin Complex No. 2.
Enter the bunker
Admin Complex 2 → bunkerUse the upgraded mission card on the objective’s access route. The armory’s later code requires separate note segments.
Opened containers can differ. Keep a return route and extract to retain carried loot.
Still unclear
- Current-build applicability and alternate entrances.
- Individually inspected close-up of this exact lock.
Bank Branch Vault AccessKey destination · Approach notes
Currency-storage rooms in South Korean bank branches.
Bank Branch Vault Access · Link to this route
Carry the matching key and check the named interaction before unlocking.
Find the described area
Floor not specifiedCurrency-storage rooms in South Korean bank branches.
Opened containers can differ. Keep a return route and extract to retain carried loot.
Still unclear
- Current-build applicability and alternate entrances.
- Individually inspected close-up of this exact lock.
- Exact floor or continuous vertical transition.
- Complete turn-by-turn approach.
Black KeycardKey destination · Destination unresolved
Reported keycard name; destination and current identity remain unresolved.
Black Keycard · Link to this route
This historical key name has no established current destination.
Do not substitute it for a later named key without matching the in-game card.
Still unclear
- Current-build applicability and alternate entrances.
- Individually inspected close-up of this exact lock.
- Exact floor or continuous vertical transition.
- Complete turn-by-turn approach.
Black Market Weapons Locker KeyKey destination · 2 stops
Follow the hanrim shop stockroom approach.
Black Market Weapons Locker Key · Link to this route
Carry the matching key and check the named interaction before unlocking.
Other C2/B7 community references are additional reports; they do not replace the pictured Hanrim location.
Shop counter
Hanrim shop stockroomEnter the Hanrim Village shop and pass behind the counter through the green staff doors.
Stockroom locker
Hanrim shop stockroomCheck the green cabinet for BLACKMARKET WEAPONS LOCKER before using the key.
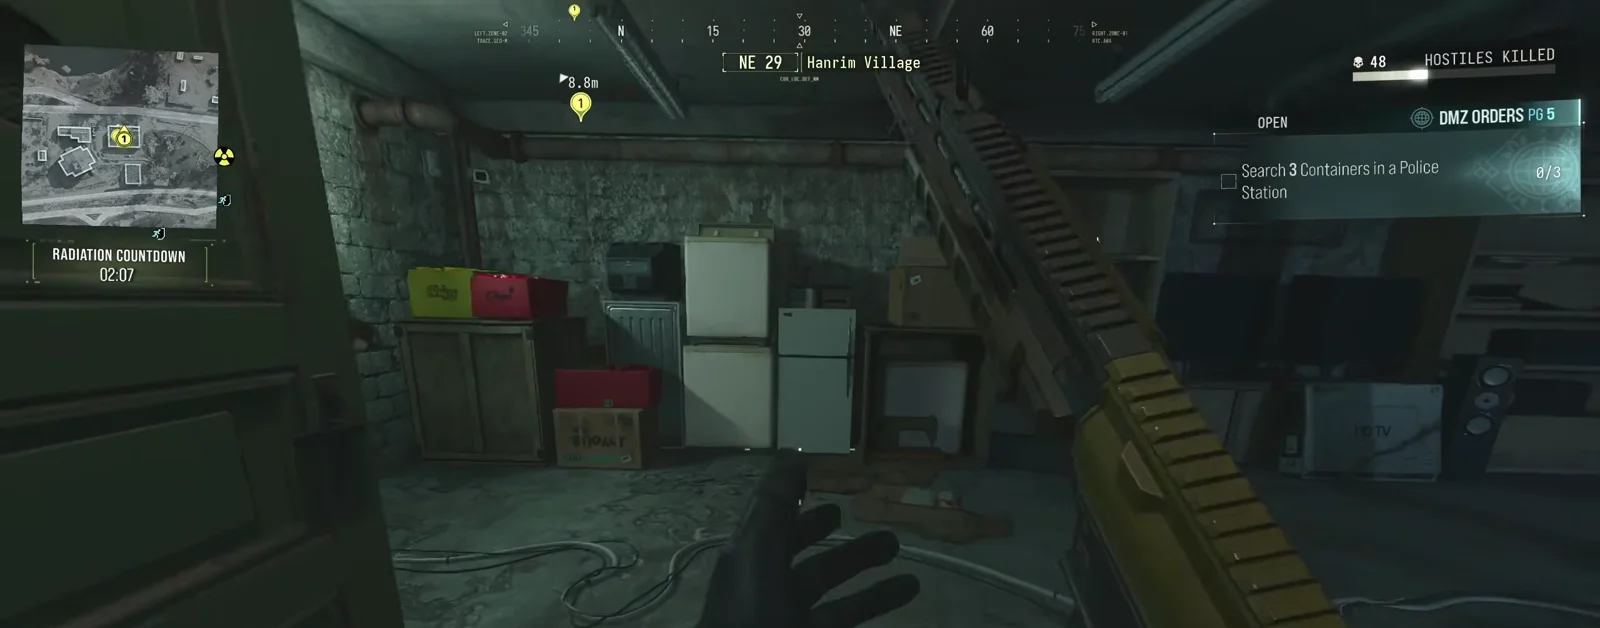
Route reference Hanrim Village shop stockroom beyond an open green staff door Gameplay © Activision · DMZ Codex ↗ 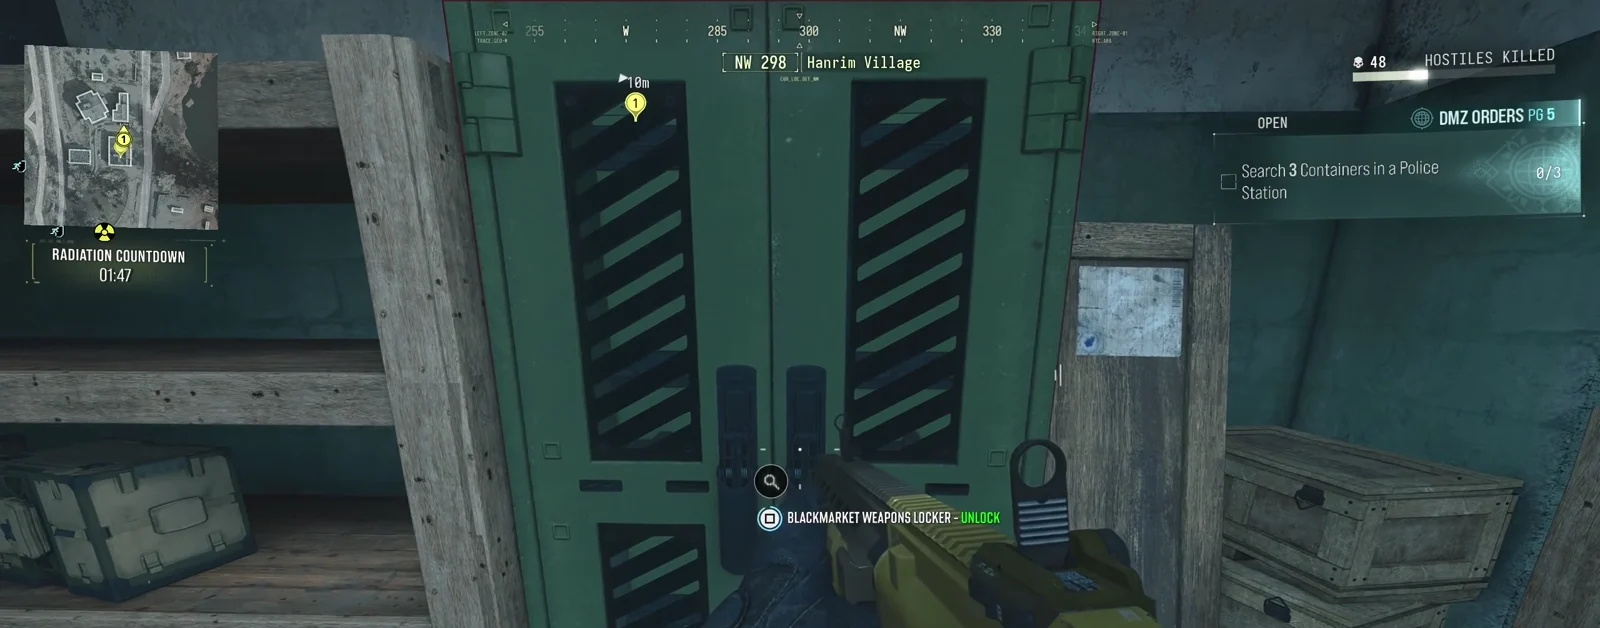
Named lock close-up Hanrim green locker displaying BLACKMARKET WEAPONS LOCKER – UNLOCK Gameplay © Activision · DMZ Codex ↗
Opened containers can differ. Keep a return route and extract to retain carried loot.
Still unclear
- Current-build applicability and alternate entrances.
Boathouse KeyKey destination · 2 stops
Follow the warhead yard → waterfront garage approach.
Boathouse Key · Haneul Nuclear Reactor · Link to this route
Carry the matching key and check the named interaction before unlocking.
After the warhead fight
Warhead yard → waterfront garageDuring Fallen Ember, recover the boathouse key when the objective directs you after the reinforcements.
Boathouse garage
Warhead yard → waterfront garageUnlock and raise the marked boathouse garage door to reach the patrol boat.
Opened containers can differ. Keep a return route and extract to retain carried loot.
Still unclear
- Current-build applicability and alternate entrances.
- Individually inspected close-up of this exact lock.
Coin Mining Den keyKey destination · Approach notes
From the westernmost gas station, travel east into NuriGO West and climb to stairwell landing 3. The reported entrance is a grey OFFICE door beside a red fire alarm.
Coin Mining Den key · Coin Mining Den · NuriGO Mall · Link to this route
Carry the matching key and check the named interaction before unlocking.
Find the described area
Floor not specifiedFrom the westernmost gas station, travel east into NuriGO West and climb to stairwell landing 3. The reported entrance is a grey OFFICE door beside a red fire alarm.
Opened containers can differ. Keep a return route and extract to retain carried loot.
Still unclear
- Current-build applicability and alternate entrances.
- Individually inspected close-up of this exact lock.
- Exact floor or continuous vertical transition.
- Complete turn-by-turn approach.
Commandant OfficeKey destination · Approach notes
Look in Admin Complex No. 2 at Chang-san Air Base, along the corridor decorated with red flags and curtains. Match the Commandant Office interaction label.
Commandant Office · Commandant Office · Chang-san Air Base · Link to this route
Carry the matching key and check the named interaction before unlocking.
Find the described area
Floor not specifiedLook in Admin Complex No. 2 at Chang-san Air Base, along the corridor decorated with red flags and curtains. Match the Commandant Office interaction label.
Opened containers can differ. Keep a return route and extract to retain carried loot.
Still unclear
- Current-build applicability and alternate entrances.
- Individually inspected close-up of this exact lock.
- Exact floor or continuous vertical transition.
- Complete turn-by-turn approach.
Counting Room Vault keyKey destination · Approach notes
Use the casino’s main entrance, turn right into the caged corridor, then take the left door before the main slot-machine floor. The counting-room door is beyond the computer-filled security room, behind the Cashier area. Look for dark wood, a keypad and a fingerprint reader. It is on the main floor, not in basement parking.
Counting Room Vault key · Casino Counting Room Vault · Cheongun Village · Link to this route
Carry the matching key and check the named interaction before unlocking.
Find the described area
Floor not specifiedUse the casino’s main entrance, turn right into the caged corridor, then take the left door before the main slot-machine floor. The counting-room door is beyond the computer-filled security room, behind the Cashier area. Look for dark wood, a keypad and a fingerprint reader. It is on the main floor, not in basement parking.
Opened containers can differ. Keep a return route and extract to retain carried loot.
Still unclear
- Current-build applicability and alternate entrances.
- Individually inspected close-up of this exact lock.
- Exact floor or continuous vertical transition.
- Complete turn-by-turn approach.
Executive Arms AuctionKey destination · Approach notes
A dark teal door on a carpeted office floor of DBN Headquarters in The Grid is reported as the auction-room entrance. This is a different building from Roze’s armory.
Executive Arms Auction · Executive Arms Auction · The Grid · Link to this route
Carry the matching key and check the named interaction before unlocking.
Find the described area
Floor not specifiedA dark teal door on a carpeted office floor of DBN Headquarters in The Grid is reported as the auction-room entrance. This is a different building from Roze’s armory.
Opened containers can differ. Keep a return route and extract to retain carried loot.
Still unclear
- Current-build applicability and alternate entrances.
- Individually inspected close-up of this exact lock.
- Exact floor or continuous vertical transition.
- Complete turn-by-turn approach.
Field DepotKey destination · 2 stops
Follow the first floor approach.
Field Depot · Field Depot · Chang-san Air Base · Link to this route
Carry the matching key and check the named interaction before unlocking.
Supply warehouse
First floorAt Chang-san, find the military supply warehouse northeast of the clinic.
Maintenance room
First floorLook for the light door with a red panel in the first-floor maintenance area.
Opened containers can differ. Keep a return route and extract to retain carried loot.
Still unclear
- A separately photographed inventory key identity; Field Depot is a named lock.
- Current-build applicability and alternate entrances.
- Individually inspected close-up of this exact lock.
Gangbyeon Apartment BKey destination · 2 stops
Follow the compound echo garage → apartments approach.
Gangbyeon Apartment B · Gangbyeon Apartment B · Hajin River Heights · Link to this route
Carry the matching key and check the named interaction before unlocking.
Compound Echo
Compound Echo garage → apartmentsLocate Apartment B in the G7 compound. A published route describes garage access and a route toward its roof.
Check the exact lock
Compound Echo garage → apartmentsApartment B and the lower-floor Militia Arms Depot are separate named locks. Full door-by-door access is still incomplete.
Opened containers can differ. Keep a return route and extract to retain carried loot.
Still unclear
- Current-build applicability and alternate entrances.
- Individually inspected close-up of this exact lock.
Gas Station Electrical RoomKey destination · 2 stops
Follow the ground floor approach.
Gas Station Electrical Room · Link to this route
Carry the matching key and check the named interaction before unlocking.
Construction Zone station
Ground floorLook at the gas station in Construction Zone.
Electrical door
Ground floorThe reported grey door is beside a noticeboard on a blue-striped brick wall. Confirm the electrical-room lock.
Opened containers can differ. Keep a return route and extract to retain carried loot.
Still unclear
- Current-build applicability and alternate entrances.
- Individually inspected close-up of this exact lock.
Gun Store Weapons Locker KeyKey destination · 3 stops
Follow the shop → basement approach.
Gun Store Weapons Locker Key · Link to this route
Carry the matching key and check the named interaction before unlocking.
Choose the matching shop
Shop → basementThe card names western Cheongun and northern Songdo gun stores. At Cheongun, pass the shop counter and mascot poster to the stairs.
Basement lockers
Shop → basementDescend to the tall green lockers and read GUN STORE WEAPONS LOCKER. One recorded key use opens one locker.
Songdo alternative
Shop → basementThe other described shop is beside the yellow-canopy fuel station; pass the INFORMATION sign and descend to the green-walled room.
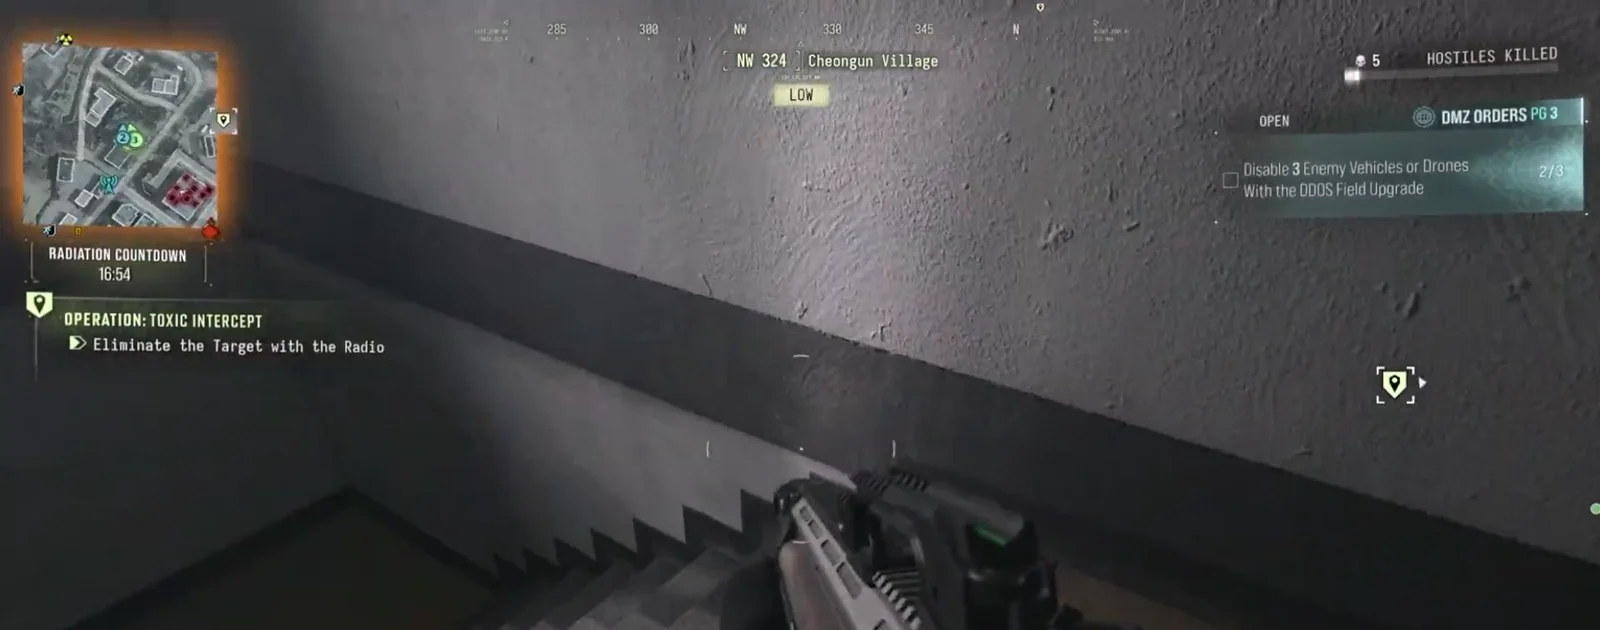
Route reference Cheongun Village stairwell between the shop and basement locker room Gameplay © Activision · DMZ Codex ↗ 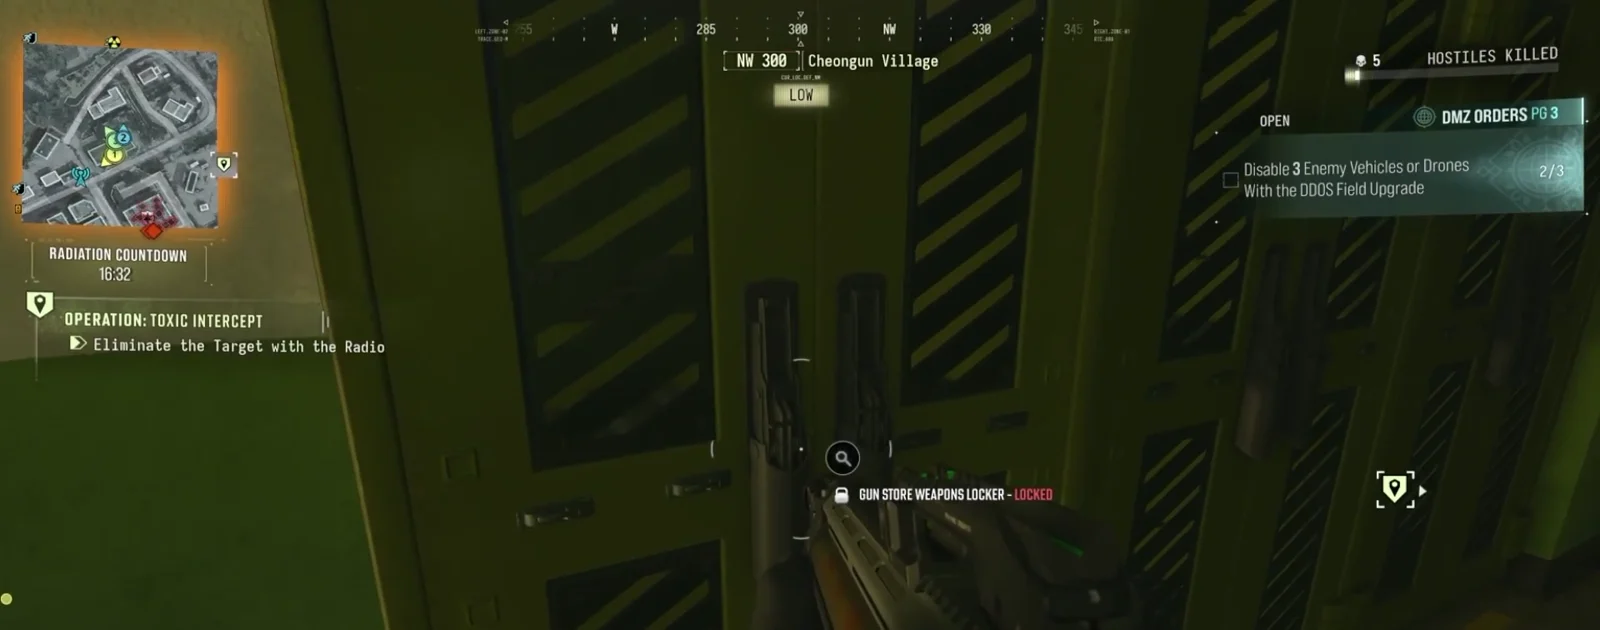
Named lock close-up Green Gun Store cabinet showing GUN STORE WEAPONS LOCKER – LOCKED Gameplay © Activision · DMZ Codex ↗
Opened containers can differ. Keep a return route and extract to retain carried loot.
Still unclear
- Current-build applicability and alternate entrances.
Haksan School ArmoryKey destination · Approach notes
At the Deadtown school, follow the outside walkway with red railings. The reported classroom entrance is a red wooden door with a glass panel; teal-and-white tiling is visible inside. The report places it around B–C / 6–7, which is an area hint rather than an exact door pin.
Haksan School Armory · Haksan School Armory · Deadtown · Link to this route
Carry the matching key and check the named interaction before unlocking.
Find the described area
Floor not specifiedAt the Deadtown school, follow the outside walkway with red railings. The reported classroom entrance is a red wooden door with a glass panel; teal-and-white tiling is visible inside. The report places it around B–C / 6–7, which is an area hint rather than an exact door pin.
Opened containers can differ. Keep a return route and extract to retain carried loot.
Still unclear
- Current-build applicability and alternate entrances.
- Individually inspected close-up of this exact lock.
- Exact floor or continuous vertical transition.
- Complete turn-by-turn approach.
Hanex Guard StationKey destination · Approach notes
Reported on an upper floor near the Hanex Bank vault in The Grid. The exact door remains unresolved.
Hanex Guard Station · Hanex Guard Station · The Grid · Link to this route
Carry the matching key and check the named interaction before unlocking.
Find the described area
Floor not specifiedReported on an upper floor near the Hanex Bank vault in The Grid. The exact door remains unresolved.
Opened containers can differ. Keep a return route and extract to retain carried loot.
Still unclear
- Current-build applicability and alternate entrances.
- Individually inspected close-up of this exact lock.
- Exact floor or continuous vertical transition.
- Complete turn-by-turn approach.
Hazard StorehouseKey destination · 2 stops
Follow the ground floor approach.
Hazard Storehouse · Hazard Storehouse · Haneul Nuclear Reactor · Link to this route
Carry the matching key and check the named interaction before unlocking.
Earlier I7 listings conflict with the newer I5 card reading. Landmarks and the lock name take priority over an approximate pin.
Cooling-tower shore
Ground floorSearch south of the reactor cooling towers for the white STORAGE shed. The newer guide reads I5 on the filmed key card.
Storehouse door
Ground floorLook for the light-blue door beside blue barrels; confirm the named lock.
Opened containers can differ. Keep a return route and extract to retain carried loot.
Still unclear
- Current-build applicability and alternate entrances.
- Individually inspected close-up of this exact lock.
Hoesik Supply RoomKey destination · Approach notes
Reported in a key-marked building near the Rice Mill at Imjin Farmland. The individual door has not been established.
Hoesik Supply Room · Hoesik Supply Room · Imjin Farmland · Link to this route
Carry the matching key and check the named interaction before unlocking.
Find the described area
Floor not specifiedReported in a key-marked building near the Rice Mill at Imjin Farmland. The individual door has not been established.
Opened containers can differ. Keep a return route and extract to retain carried loot.
Still unclear
- Current-build applicability and alternate entrances.
- Individually inspected close-up of this exact lock.
- Exact floor or continuous vertical transition.
- Complete turn-by-turn approach.
Imjin Mill Foreman's OfficeKey destination · Approach notes
Rice mill ground-floor office.
Imjin Mill Foreman's Office · Imjin Mill Foreman's Office · Imjin Farmland · Link to this route
Carry the matching key and check the named interaction before unlocking.
Find the described area
Floor not specifiedRice mill ground-floor office.
Opened containers can differ. Keep a return route and extract to retain carried loot.
Still unclear
- Current-build applicability and alternate entrances.
- Individually inspected close-up of this exact lock.
- Exact floor or continuous vertical transition.
- Complete turn-by-turn approach.
Iskra’s Control RoomKey destination · Approach notes
Reported on the upper floor of the server-room building at Cheonwang Peak Array. Published grid references disagree.
Iskra’s Control Room · Iskra’s Control Room · Cheonwang Peak Array · Link to this route
Carry the matching key and check the named interaction before unlocking.
Find the described area
Floor not specifiedReported on the upper floor of the server-room building at Cheonwang Peak Array. Published grid references disagree.
Opened containers can differ. Keep a return route and extract to retain carried loot.
Still unclear
- Current-build applicability and alternate entrances.
- Individually inspected close-up of this exact lock.
- Exact floor or continuous vertical transition.
- Complete turn-by-turn approach.
Jang-ui's Converted Power RoomKey destination · Approach notes
Reported on the bottom floor of NuriGO Mall beside the Robo Dog agility course. Published grids differ.
Jang-ui's Converted Power Room · Jang-ui's Converted Power Room · NuriGO Mall · Link to this route
Carry the matching key and check the named interaction before unlocking.
Find the described area
Floor not specifiedReported on the bottom floor of NuriGO Mall beside the Robo Dog agility course. Published grids differ.
Opened containers can differ. Keep a return route and extract to retain carried loot.
Still unclear
- Current-build applicability and alternate entrances.
- Individually inspected close-up of this exact lock.
- Exact floor or continuous vertical transition.
- Complete turn-by-turn approach.
Jin-Tae's Private LoungeKey destination · 3 stops
Follow the lobby → penthouse approach.
Jin-Tae's Private Lounge · Heavenly Luck Casino · Link to this route
Carry the matching key and check the named interaction before unlocking.
Restore lift power
Lobby → penthouseFrom the casino’s southern lobby entrance, check the left lift. If it lacks power, descend the outer-wing stairs and start the parking back-room generator.
Penthouse passage
Lobby → penthouseRide up, go upstairs and left, and follow the passage to its end. Turn right, then immediately right/behind toward the lounge.
Named doors
Lobby → penthouseConfirm JIN-TAE’S PRIVATE LOUNGE on the lock. Counting Room Vault and Vault Armory use different keys.
Opened containers can differ. Keep a return route and extract to retain carried loot.
Still unclear
- Current-build applicability and alternate entrances.
- Individually inspected close-up of this exact lock.
Lucera Suite 703 BedroomKey destination · 2 stops
Follow the uppermost apartment floor below roof approach.
Lucera Suite 703 Bedroom · Lucera Suite 703 Bedroom · Hotel Lucera · Link to this route
Carry the matching key and check the named interaction before unlocking.
Hotel Lucera
Uppermost apartment floor below roofReach the hotel’s uppermost apartment floor immediately below the roof.
Suite 703
Uppermost apartment floor below roofIdentify the suite and read its bedroom lock before using the key.
Opened containers can differ. Keep a return route and extract to retain carried loot.
Still unclear
- Current-build applicability and alternate entrances.
- Individually inspected close-up of this exact lock.
Mechanic's ShackKey destination · Approach notes
Find the standalone hut south of the clinic in Cheongun Village, near the village’s southern edge and a low wall.
Mechanic's Shack · Link to this route
Carry the matching key and check the named interaction before unlocking.
Find the described area
Floor not specifiedFind the standalone hut south of the clinic in Cheongun Village, near the village’s southern edge and a low wall.
Opened containers can differ. Keep a return route and extract to retain carried loot.
Still unclear
- Current-build applicability and alternate entrances.
- Individually inspected close-up of this exact lock.
- Exact floor or continuous vertical transition.
- Complete turn-by-turn approach.
Militia Arms DepotKey destination · Approach notes
The reported armory is on the lower floor of Gangbyeon Apartment B in Compound Echo at Hajin River Heights.
Militia Arms Depot · Link to this route
Carry the matching key and check the named interaction before unlocking.
Find the described area
Floor not specifiedThe reported armory is on the lower floor of Gangbyeon Apartment B in Compound Echo at Hajin River Heights.
Opened containers can differ. Keep a return route and extract to retain carried loot.
Still unclear
- Current-build applicability and alternate entrances.
- Individually inspected close-up of this exact lock.
- Exact floor or continuous vertical transition.
- Complete turn-by-turn approach.
Mill Explosives LabKey destination · Approach notes
Explosives laboratory at the rice mill.
Mill Explosives Lab · Mill Explosives Lab · Imjin Farmland · Link to this route
Carry the matching key and check the named interaction before unlocking.
Find the described area
Floor not specifiedExplosives laboratory at the rice mill.
Opened containers can differ. Keep a return route and extract to retain carried loot.
Still unclear
- Current-build applicability and alternate entrances.
- Individually inspected close-up of this exact lock.
- Exact floor or continuous vertical transition.
- Complete turn-by-turn approach.
Mirae Electrical Room keyKey destination · 2 stops
Follow the northwest parking → b2 approach.
Mirae Electrical Room key · Mirae Electrical Room · Mirae General Hospital · Link to this route
Carry the matching key and check the named interaction before unlocking.
Northwest garage
Northwest parking → B2Enter the hospital’s northwest parking garage and descend past B1 to B2.
Electrical room
Northwest parking → B2Find grey double doors by the purple Danger wall. Confirm the Mirae Electrical Room prompt.
Opened containers can differ. Keep a return route and extract to retain carried loot.
Still unclear
- Current-build applicability and alternate entrances.
- Individually inspected close-up of this exact lock.
Netshin IT RoomKey destination · Approach notes
Go toward the upper-floor server clusters in the Netshin Tech Complex. A report describes auto-turrets in the room and reinforcements from elsewhere in the building.
Netshin IT Room · Netshin IT Room · Nenshin Tech Complex · Link to this route
Carry the matching key and check the named interaction before unlocking.
Find the described area
Floor not specifiedGo toward the upper-floor server clusters in the Netshin Tech Complex. A report describes auto-turrets in the room and reinforcements from elsewhere in the building.
Opened containers can differ. Keep a return route and extract to retain carried loot.
Still unclear
- Current-build applicability and alternate entrances.
- Individually inspected close-up of this exact lock.
- Exact floor or continuous vertical transition.
- Complete turn-by-turn approach.
Old Barber ShopKey destination · Approach notes
Reported beside the crab shack on Songdo Wharf’s southern side. H6 and I7 references disagree; use the named door prompt rather than treating either grid as surveyed.
Old Barber Shop · Old Barber Shop · Songdo Wharf · Link to this route
Carry the matching key and check the named interaction before unlocking.
Find the described area
Floor not specifiedReported beside the crab shack on Songdo Wharf’s southern side. H6 and I7 references disagree; use the named door prompt rather than treating either grid as surveyed.
Opened containers can differ. Keep a return route and extract to retain carried loot.
Still unclear
- Current-build applicability and alternate entrances.
- Individually inspected close-up of this exact lock.
- Exact floor or continuous vertical transition.
- Complete turn-by-turn approach.
Police Station KeyKey destination · Approach notes
Reported armory doors include Revolution Dam and a basement door at Pyonghwa Village beside the holding-cell caged window. Read the actual key card for its station; sources disagree on whether the same key opens all five station armories.
Police Station Key · Link to this route
Carry the matching key and check the named interaction before unlocking.
Find the described area
Floor not specifiedReported armory doors include Revolution Dam and a basement door at Pyonghwa Village beside the holding-cell caged window. Read the actual key card for its station; sources disagree on whether the same key opens all five station armories.
Opened containers can differ. Keep a return route and extract to retain carried loot.
Still unclear
- Current-build applicability and alternate entrances.
- Individually inspected close-up of this exact lock.
- Exact floor or continuous vertical transition.
- Complete turn-by-turn approach.
Police Weapon DepositoryKey destination · Approach notes
Reported north of the Wolves Stadium police station. The precise entrance is unconfirmed.
Police Weapon Depository · Police Weapon Depository · Wolves Stadium · Link to this route
Carry the matching key and check the named interaction before unlocking.
Find the described area
Floor not specifiedReported north of the Wolves Stadium police station. The precise entrance is unconfirmed.
Opened containers can differ. Keep a return route and extract to retain carried loot.
Still unclear
- Current-build applicability and alternate entrances.
- Individually inspected close-up of this exact lock.
- Exact floor or continuous vertical transition.
- Complete turn-by-turn approach.
Prison Encampment StorageKey destination · Approach notes
Ordnance store southeast of the prison camp.
Prison Encampment Storage · Prison Encampment Storage · 14th Political Prison · Link to this route
Carry the matching key and check the named interaction before unlocking.
Find the described area
Floor not specifiedOrdnance store southeast of the prison camp.
Opened containers can differ. Keep a return route and extract to retain carried loot.
Still unclear
- Current-build applicability and alternate entrances.
- Individually inspected close-up of this exact lock.
- Exact floor or continuous vertical transition.
- Complete turn-by-turn approach.
Re-Education Center AnnexKey destination · 2 stops
Follow the ground-floor annex approach.
Re-Education Center Annex · Re-Education Center Annex · Deadtown · Link to this route
Carry the matching key and check the named interaction before unlocking.
Re-Education Center
Ground-floor annexReach the ground-floor annex in Deadtown.
Annex door
Ground-floor annexThe described entrance is a wooden door with NO PUBLIC ACCESS signage; confirm its named prompt.
Opened containers can differ. Keep a return route and extract to retain carried loot.
Still unclear
- Current-build applicability and alternate entrances.
- Individually inspected close-up of this exact lock.
Reactor 02 Control RoomKey destination · Approach notes
A control-room destination at Haneul Nuclear Reactor is reported; the precise door and contents remain unconfirmed.
Reactor 02 Control Room · Reactor 02 Control Room · Haneul Nuclear Reactor · Link to this route
Carry the matching key and check the named interaction before unlocking.
Find the described area
Floor not specifiedA control-room destination at Haneul Nuclear Reactor is reported; the precise door and contents remain unconfirmed.
Opened containers can differ. Keep a return route and extract to retain carried loot.
Still unclear
- Current-build applicability and alternate entrances.
- Individually inspected close-up of this exact lock.
- Exact floor or continuous vertical transition.
- Complete turn-by-turn approach.
Reactor DRC Locker keyKey destination · 2 stops
Follow the reactor 02 → underwater pool approach.
Reactor DRC Locker key · Reactor 02 · Link to this route
Carry the matching key and check the named interaction before unlocking.
Key-card H4 and community-room I4 disagree; neither is an underwater door coordinate.
Reactor 02 pool
Reactor 02 → underwater poolBring the matching key and radiation protection. A reported approach uses the damaged upper structure and debris to descend; the opening clip starts inside.
Underwater lock
Reactor 02 → underwater poolSearch underwater and confirm REACTOR DRC LOCKER. The western pool is a reported search lead; return to air before extending the search.
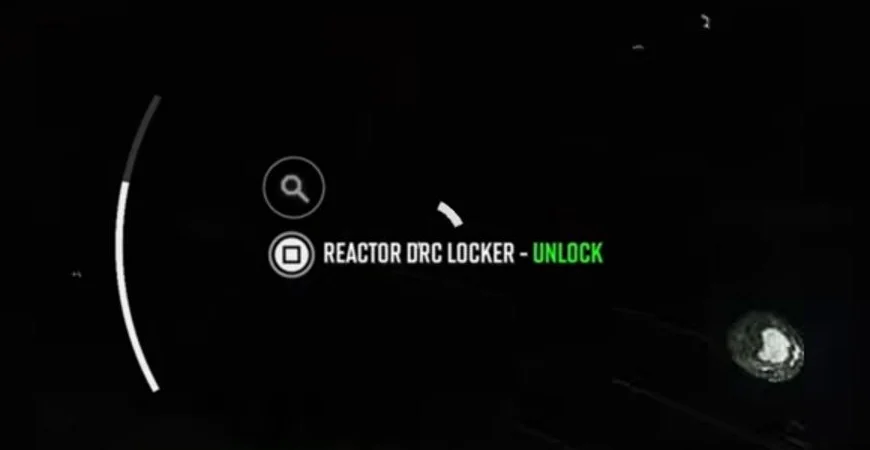
Named lock close-up Reactor DRC Locker — Unlock prompt visible in dark water Gameplay © Activision · DMZ Codex ↗
Opened containers can differ. Keep a return route and extract to retain carried loot.
Still unclear
- Current-build applicability and alternate entrances.
Rice Mill BunkerKey destination · Approach notes
At the Rice Mill in Imjin Farmland, look for a green metal door with a round knob and the Rice Mill Bunker prompt. The nearby Imjin Mill Foreman’s Office is a separate locked door.
Rice Mill Bunker · Rice Mill Bunker · Imjin Farmland · Link to this route
Carry the matching key and check the named interaction before unlocking.
Find the described area
Floor not specifiedAt the Rice Mill in Imjin Farmland, look for a green metal door with a round knob and the Rice Mill Bunker prompt. The nearby Imjin Mill Foreman’s Office is a separate locked door.
Opened containers can differ. Keep a return route and extract to retain carried loot.
Still unclear
- Current-build applicability and alternate entrances.
- Individually inspected close-up of this exact lock.
- Exact floor or continuous vertical transition.
- Complete turn-by-turn approach.
Roze’s Highrise Armory keyKey destination · 3 stops
Follow the ground floor → reported level 14 approach.
Roze’s Highrise Armory key · Roze’s Highrise Armory · Nenshin Tech Complex · Link to this route
Carry the matching key and check the named interaction before unlocking.
Earlier sources only say upper floors; confirm the live floor sign and lock.
Netshin entrance
Ground floor → reported level 14Use the right-side elevator shaft from the tech complex’s main ground-floor entrance.
Balcony and stairs
Ground floor → reported level 14Follow the balcony and stairs toward the upper office floors. A newer route names level 14.
Armory door
Ground floor → reported level 14Check the teal door for Roze’s armory name. Her DBN rooftop encounter is a separate destination.
Opened containers can differ. Keep a return route and extract to retain carried loot.
Still unclear
- Current-build applicability and alternate entrances.
- Individually inspected close-up of this exact lock.
Shop Records RoomKey destination · 2 stops
Follow the shop hallway approach.
Shop Records Room · Shop Records Room · Wolves Stadium · Link to this route
Carry the matching key and check the named interaction before unlocking.
Goh24 entrance
Shop hallwayAt Wolves Stadium, find the Goh24 shop’s glass double doors in the red-brick facade.
Records door
Shop hallwayPass the blue-and-white counters into the hall. Check the frosted door beside the apartment-sale poster.
Opened containers can differ. Keep a return route and extract to retain carried loot.
Still unclear
- Current-build applicability and alternate entrances.
- Individually inspected close-up of this exact lock.
Shopping DRC LockerKey destination · 3 stops
Follow the lower parking / lab side room approach.
Shopping DRC Locker · Shopping DRC Locker · NuriGO Mall · Link to this route
Carry the matching key and check the named interaction before unlocking.
Reach the lab
Lower parking / lab side roomFollow Shopping Hacks through its separate four-core lab door. The DRC side-room gate is an additional interaction.
Extra gate
Lower parking / lab side roomThe reported side-room terminal takes eight working K9 cores; read its current counter. Bring the named Shopping DRC Locker key too.
Named locker
Lower parking / lab side roomInside the side room, match the Shopping DRC Locker prompt before unlocking.
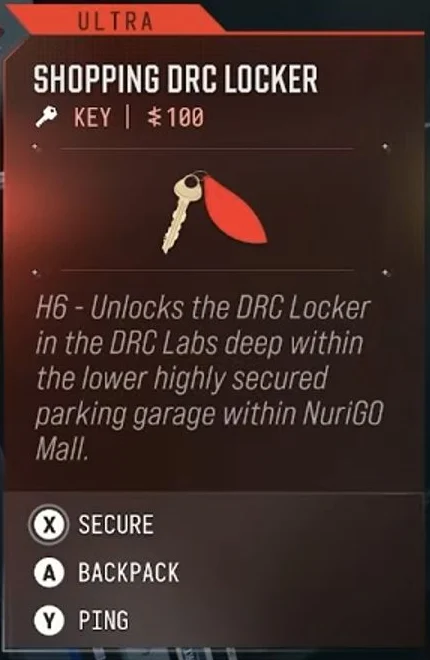
Key card Ultra Shopping DRC Locker key card listing H6 and the lower secured parking garage at NuriGO Mall Gameplay © Activision · DMZ Codex ↗ 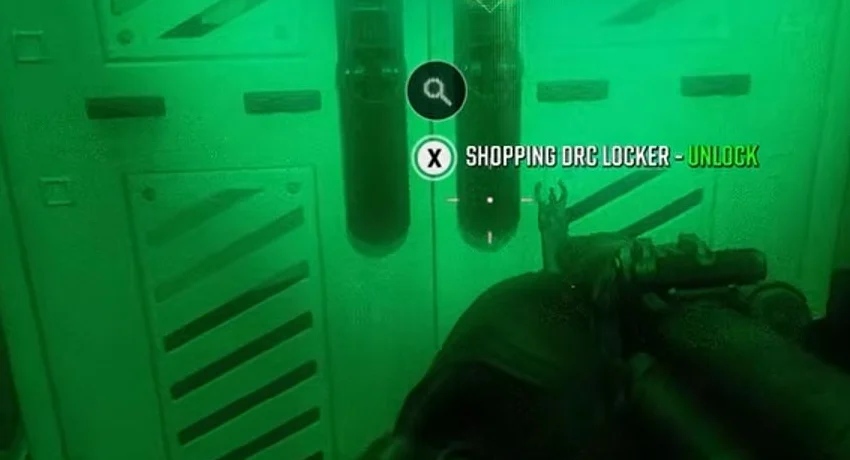
Named lock close-up Shopping DRC Locker — Unlock prompt on the laboratory locker Gameplay © Activision · DMZ Codex ↗
Opened containers can differ. Keep a return route and extract to retain carried loot.
Still unclear
- A full outside-to-lock continuous route and all alternative access methods.
- Current-build applicability and alternate entrances.
Supreme Leader Access CardKey destination · 2 stops
Follow the admin complex 2 → bunker doors approach.
Supreme Leader Access Card · Admin Complex No. 2 · Link to this route
Carry the matching key and check the named interaction before unlocking.
Stairwell 02
Admin Complex 2 → bunker doorsAt Admin Complex No. 2, take stairwell 02 and the corridor toward the metal stairs.
Blast-door reader
Admin Complex 2 → bunker doorsFind the white blast doors and their reader on the right. The card’s B6 is a search reference.
Opened containers can differ. Keep a return route and extract to retain carried loot.
Still unclear
- Equivalence to Iron Citadel’s upgraded mission card is not established; keep the cards separate.
- Current-build applicability and alternate entrances.
- Individually inspected close-up of this exact lock.
The Chemist's Secure ArmoryKey destination · Approach notes
Reported as a secured bunker near the reactor boathouse. The Chemist association is suggested by the name, not established as a drop source.
The Chemist's Secure Armory · The Chemist's Secure Armory · Haneul Nuclear Reactor · Link to this route
Carry the matching key and check the named interaction before unlocking.
Find the described area
Floor not specifiedReported as a secured bunker near the reactor boathouse. The Chemist association is suggested by the name, not established as a drop source.
Opened containers can differ. Keep a return route and extract to retain carried loot.
Still unclear
- Current-build applicability and alternate entrances.
- Individually inspected close-up of this exact lock.
- Exact floor or continuous vertical transition.
- Complete turn-by-turn approach.
The Citadel South WingKey destination · 2 stops
Follow the south wing; inner-cell level unknown approach.
The Citadel South Wing · The Citadel South Wing · 14th Political Prison · Link to this route
Carry the matching key and check the named interaction before unlocking.
South Wing lock
South wing; inner-cell level unknownFind the exterior South Wing lock within the prison complex.
Separate inner keypad
South wing; inner-cell level unknownThe cell keypad is another interaction. Find the partial-code notes in your deployment; a universal code is not established.
Opened containers can differ. Keep a return route and extract to retain carried loot.
Still unclear
- Exact wing approach and a dependable route to every code note.
- Current-build applicability and alternate entrances.
- Individually inspected close-up of this exact lock.
The Doctor's Command OfficeKey destination · 2 stops
Follow the floor 7 approach.
The Doctor's Command Office · The Doctor's Command Office · Mirae General Hospital · Link to this route
Carry the matching key and check the named interaction before unlocking.
Older descriptions say upper or top floor. The newer narrated route names floor 7; the precise door position is not surveyed.
Office landing
Floor 7At Mirae floor 7, look for the OFFICE 701–712 / CONFERENCE ROOM 704 | 705 sign.
Named office
Floor 7Follow the offices to the wooden door and check the Doctor’s Command Office prompt.
Opened containers can differ. Keep a return route and extract to retain carried loot.
Still unclear
- Current-build applicability and alternate entrances.
- Individually inspected close-up of this exact lock.
Train Depot StorageroomKey destination · 2 stops
Follow the western entrance → basement approach.
Train Depot Storageroom · Train Depot Storageroom · Cheongun Village · Link to this route
Carry the matching key and check the named interaction before unlocking.
West depot entrance
Western entrance → basementEnter the E5 train depot near Cheongun’s fire station from its western end.
Basement stairs
Western entrance → basementTake the stairs on the right downstairs and check for RAIL DEPOT STORAGE on the lock.
Opened containers can differ. Keep a return route and extract to retain carried loot.
Still unclear
- Current-build applicability and alternate entrances.
- Individually inspected close-up of this exact lock.
Underground Propaganda Store RoomKey destination · Approach notes
A dark underground corridor beneath the Re-Education Center in Deadtown is reported to lead to the named locked store room.
Underground Propaganda Store Room · Underground Propaganda Store Room · Deadtown · Link to this route
Carry the matching key and check the named interaction before unlocking.
Find the described area
Floor not specifiedA dark underground corridor beneath the Re-Education Center in Deadtown is reported to lead to the named locked store room.
Opened containers can differ. Keep a return route and extract to retain carried loot.
Still unclear
- Current-build applicability and alternate entrances.
- Individually inspected close-up of this exact lock.
- Exact floor or continuous vertical transition.
- Complete turn-by-turn approach.
Vault ArmoryKey destination · Approach notes
In Heavenly Luck Casino, cross toward the slot machines and take the white side door into the stairs. Descend to the parking level, pass the military vehicles, and use the grey double doors near the yellow restricted-area sign to reach the small mesh-cage armory. The separate garage gate opened by the security system is part of Operation Silent Ledger and does not use this key.
Vault Armory · Vault Armory · Cheongun Village · Link to this route
Carry the matching key and check the named interaction before unlocking.
Find the described area
Floor not specifiedIn Heavenly Luck Casino, cross toward the slot machines and take the white side door into the stairs. Descend to the parking level, pass the military vehicles, and use the grey double doors near the yellow restricted-area sign to reach the small mesh-cage armory. The separate garage gate opened by the security system is part of Operation Silent Ledger and does not use this key.
Opened containers can differ. Keep a return route and extract to retain carried loot.
Still unclear
- Current-build applicability and alternate entrances.
- Individually inspected close-up of this exact lock.
- Exact floor or continuous vertical transition.
- Complete turn-by-turn approach.
Weapons Mod WorkshopKey destination · Approach notes
Reported upstairs in the military repair garage west of the Chang-san Air Base clinic. Match the named lock prompt; the entrance is not a surveyed map pin.
Weapons Mod Workshop · Link to this route
Carry the matching key and check the named interaction before unlocking.
Find the described area
Floor not specifiedReported upstairs in the military repair garage west of the Chang-san Air Base clinic. Match the named lock prompt; the entrance is not a surveyed map pin.
Opened containers can differ. Keep a return route and extract to retain carried loot.
Still unclear
- Current-build applicability and alternate entrances.
- Individually inspected close-up of this exact lock.
- Exact floor or continuous vertical transition.
- Complete turn-by-turn approach.